This guide provides clear instructions to install and set up smart home security cameras, enabling you to monitor your property remotely. It is designed for beginners with minimal technical experience. Completing this task improves your home security and allows remote access to live feeds and recordings.

Blink Outdoor 4 Wireless Smart Security Camera System
- ✔ Resolution: 1080p HD
- ✔ Battery Life: Up to 2 years
- ✔ Number of Cameras: 5

Blink Mini 2 Home Security & Pet Camera with HD Video, Color Night View, Motion Detection, Two-Way Audio, and Built-in Spotlight
- ✔ Resolution: 1080p HD
- ✔ Night Vision: Color with built-in spotlight
- ✔ Field of View: Wider view

Blink Outdoor 4 Wireless Smart Security Camera System (3 Cameras, Sync Module Core)
- ✔ Battery Life: Up to 2 years
- ✔ Video Resolution: 1080p HD
- ✔ Night Vision: Infrared
Difficulty: Beginner | Time: 30-60 minutes
What You’ll Need
Tools & Materials:
- Power drill (if mounting on wall), Phillips screwdriver
- Smartphone or tablet
- Wi-Fi network with internet access
- Optional: ladder for high placements
Knowledge:
- Basic familiarity with Wi-Fi networks
- Ability to follow step-by-step instructions
Blink Outdoor 4 Wireless Smart Security Camera System
<p>The <strong>Blink Outdoor 4</strong> stands out for its robust outdoor capabilities, boasting a **long battery life of up to two years** and high-definition 1080p video with infrared night vision. Its easy setup makes it accessible for DIY installation, and with five cameras included, it offers comprehensive coverage. Compared with the Blink Mini 2, it excels in outdoor durability and multi-camera coverage, though it does require a subscription for advanced features like person detection. The included sync module simplifies network management, making it a strong choice for those prioritizing outdoor security.</p>
Pros:
- Long-lasting battery life up to two years
- High-definition video with infrared night vision
- Includes five cameras for broad coverage
- Easy to set up and control via smartphone app
Cons:
- Person detection requires a subscription
- Some features, like cloud storage, may incur extra costs
- Limited local storage options
Best for: Homeowners seeking a comprehensive outdoor security solution with minimal maintenance
Not ideal for: Users who need local storage options without ongoing subscription costs or primarily indoor monitoring
Bottom line: The Blink Outdoor 4 offers a reliable, long-term outdoor security setup ideal for users willing to subscribe for enhanced features.
“The Blink Outdoor 4 offers a reliable, long-term outdoor security setup ideal for users willing to subscribe for enhanced features.”
Blink Mini 2 Home Security & Pet Camera with HD Video, Color Night View, Motion Detection, Two-Way Audio, and Built-in Spotlight
<p>The <strong>Blink Mini 2</strong> is perfect for indoor environments, offering a compact, plug-in design with 1080p HD video and vibrant color night vision thanks to its built-in spotlight. Its wider field of view enhances coverage for smaller rooms or pet areas. While setup is straightforward, it’s important to note that continuous streaming and some smart alerts require a separate subscription. Its compatibility with Alexa makes voice control seamless, but outdoor use is limited by the need for additional weatherproofing accessories and the lack of local storage options.</p>
Pros:
- Color night vision with built-in spotlight
- Wider field of view for better room coverage
- Easy installation and setup
- Supports two-way audio and smart notifications
Cons:
- Requires a separate subscription for continuous streaming
- Limited local storage options
- Weather-resistant power adapter sold separately
Best for: Indoor users wanting an easy-to-install, high-quality camera with smart home integration
Not ideal for: Users seeking a weatherproof camera for outdoor or harsh environments without extra accessories
Bottom line: The Blink Mini 2 excels for indoor monitoring, especially in pet or small home areas, but needs additional accessories for outdoor durability.
“The Blink Mini 2 excels for indoor monitoring, especially in pet or small home areas, but needs additional accessories for outdoor durability.”
Blink Outdoor 4 Wireless Smart Security Camera System (3 Cameras, Sync Module Core)
<p>The <strong>Blink Outdoor 4 System</strong> offers a cost-effective way to secure multiple outdoor areas, with three cameras and a Sync Module Core, all running up to two years on batteries. Its 1080p HD live view and infrared night vision ensure clear visuals, and setup is straightforward for DIY enthusiasts. Compared with the five-camera version, this system is more affordable but lacks local storage, relying on cloud services that require a subscription after the trial. It’s ideal for budget-conscious users who don’t mind ongoing costs and want multi-camera coverage.</p>
Pros:
- Affordable multi-camera setup
- Long battery life up to two years
- HD live view with infrared night vision
- Easy to install and integrate with Alexa
Cons:
- No local storage included with Sync Module Core
- Requires subscription for person detection
- Cloud storage costs after trial
Best for: Budget-minded homeowners wanting multi-camera outdoor security without high upfront costs
Not ideal for: Users who prefer local storage options or need person detection without extra subscriptions
Bottom line: The Blink Outdoor 4 System delivers solid outdoor coverage at a budget-friendly price, with some tradeoffs in storage options and advanced features.
“The Blink Outdoor 4 System delivers solid outdoor coverage at a budget-friendly price, with some tradeoffs in storage options and advanced features.”
As an Amazon Associate we earn from qualifying purchases.
Before You Start
Check your Wi-Fi signal strength at the intended camera locations to prevent connectivity issues. Make sure your smartphone or tablet is updated with the latest app version for the camera brand you choose. Have all mounting hardware and tools ready before beginning installation.
Step-by-Step Instructions
Step 1: Choose optimal camera locations
Select spots that cover key areas such as entrances, driveways, and backyard. Ensure the locations have a strong Wi-Fi signal and access to power outlets if required. Avoid placing cameras in direct sunlight or facing reflective surfaces that may affect video quality.
Tip: Use a Wi-Fi signal strength app to verify connectivity at your chosen spots before installation.
Check: You can access the camera feed from your smartphone in the intended location with minimal lag or disconnects.
Step 2: Mount the cameras securely
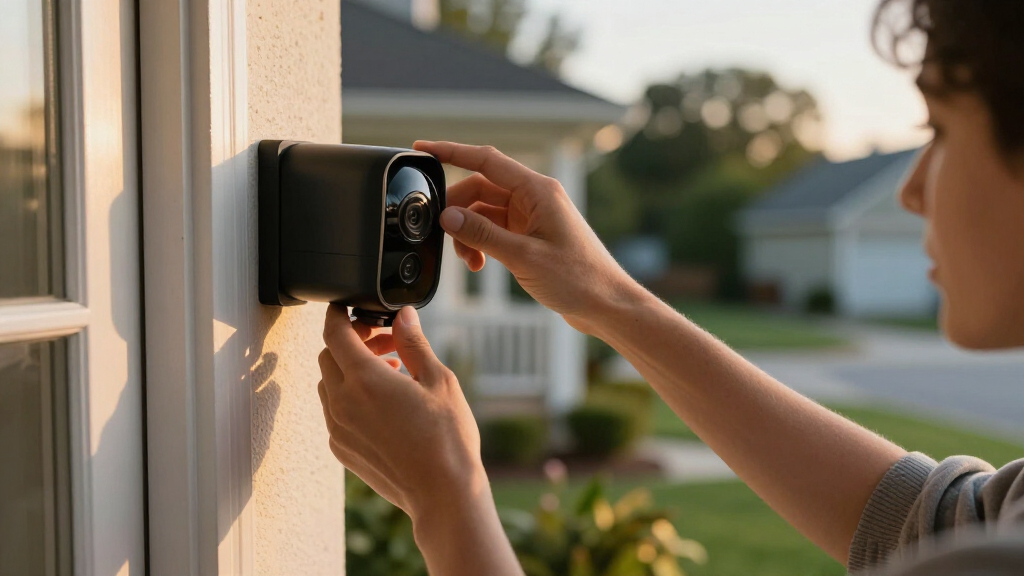
Use the provided mounting brackets and hardware to attach the camera to walls, eaves, or ceilings. Drill holes if necessary, insert anchors if mounting on drywall, and tighten screws firmly. Adjust the camera angle to cover the desired area.
Tip: Avoid loose fittings; secure mounting prevents vibrations or falling over time.
Check: Camera is firmly mounted and correctly angled, with unobstructed view of the target area.
Step 3: Connect cameras to power
Plug each camera into a nearby power outlet or connect via Power over Ethernet (PoE) if supported. Confirm that the power indicator lights up, indicating the camera is powered.
Tip: Use weatherproof outlets or extension cords if outdoor installation is necessary.
Check: Camera powers on and shows a status indicator, ready for configuration.
Step 4: Download and install the camera app
Locate the camera brand’s app in your device’s app store, download it, and install following on-screen prompts.
Tip: Read reviews if unsure about app reliability; ensure it’s the official app for your camera model.
Check: App is installed and opens without errors, ready for device setup.
Step 5: Add cameras to the app
Open the app, create an account if needed, and follow the prompts to add new devices. Usually, this involves scanning a QR code on the camera or entering a serial number.
Tip: Keep the camera close to your device during setup to improve scanning accuracy.
Check: Camera feeds appear in the app and are accessible from your device.
Step 6: Configure Wi-Fi connection
Select your home Wi-Fi network in the app, enter the password, and connect each camera to your network. Confirm that the connection is stable and the camera remains online.
Tip: Use a 2.4 GHz Wi-Fi band for better compatibility, if your network has dual bands.
Check: The camera shows a ‘connected’ status in the app, and live video streams load smoothly.
Step 7: Adjust camera settings
Use the app to set motion detection zones, alert preferences, recording schedules, and video quality. Position motion zones to avoid false alerts from trees or passing cars.
Tip: Test motion detection by walking through the camera’s view and verifying you receive notifications.
Check: Camera detects motion accurately, sends alerts, and records correctly according to your settings.
Step 8: Test the entire system
Verify live feeds from multiple devices, trigger motion events, and check recorded footage. Ensure remote access works from outside your home network.
Tip: Use mobile data to test remote viewing if Wi-Fi is limited to your local network.
Check: You can view live video and recordings remotely, with timely alerts for motion detection.
Common Mistakes to Avoid
- Mounting cameras too high or too low — Position cameras at eye level or slightly higher for optimal coverage and clearer images.
- Using weak Wi-Fi signals or dead zones — Test Wi-Fi strength beforehand; consider Wi-Fi extenders or mesh networks to improve coverage.
- Not securing mounting hardware properly — Use appropriate anchors and tighten screws securely to prevent movement or falls.
Troubleshooting
Problem: Camera shows offline in app
Solution: Check power connection, restart the camera, and verify Wi-Fi signal strength. Reconnect to Wi-Fi if needed.
Problem: Cannot access live feed remotely
Solution: Ensure your internet connection is stable, check app permissions, and verify remote access settings in the app.
Problem: Motion alerts are not triggering
Solution: Adjust motion detection zones and sensitivity; test by walking through the camera’s view and confirming alerts.
What Success Looks Like
You can view live streams and recorded footage reliably from your smartphone or tablet. The cameras are securely mounted, connected to Wi-Fi, and detect motion accurately with appropriate alerts. The system remains online without frequent disconnects.
Next Steps
Regularly update the camera firmware and app to keep security features current. Clean camera lenses periodically for clear video quality. Review stored footage and adjust settings as needed. Consider adding more cameras for comprehensive coverage or integrating with other smart home devices.
Frequently Asked Questions
Can I install smart security cameras outdoors?
Yes, many cameras are weatherproof and designed for outdoor use. Verify the IP rating (e.g., IP65 or higher) before installation outdoors.
Do I need a subscription for recording footage?
Some cameras offer free local storage via SD cards, while others require a subscription for cloud storage. Check your camera’s specifications and choose based on your needs.
Can I view multiple cameras at once?
Most apps support viewing multiple camera feeds simultaneously on your device. Confirm this feature before purchasing if needed.
What if my Wi-Fi connection is weak?
Use Wi-Fi extenders or mesh networks to strengthen coverage. Reduce interference by minimizing obstacles between the router and cameras.