
TL;DR
Acoustic dampening in small spaces isn’t about stuffing foam everywhere—it’s about smart placement, sealing leaks, and managing heat. Moving your rig into a closet can drastically cut noise, but ventilation is key. With the right approach, you can make a closet work as a quiet, effective space.
Imagine turning a tiny closet into your secret weapon for quiet, professional-sounding recordings or streaming. It sounds simple—just pack it with foam, right? But the real magic lies in understanding what silence truly requires.
Most people rush to buy foam panels or soundproof curtains, thinking that’s the answer. Yet, the truth is, the most effective way to cut noise and echo is to control where sound goes and how heat escapes. This guide reveals the surprising truth: placement, ventilation, and smart materials beat endless foam every time.
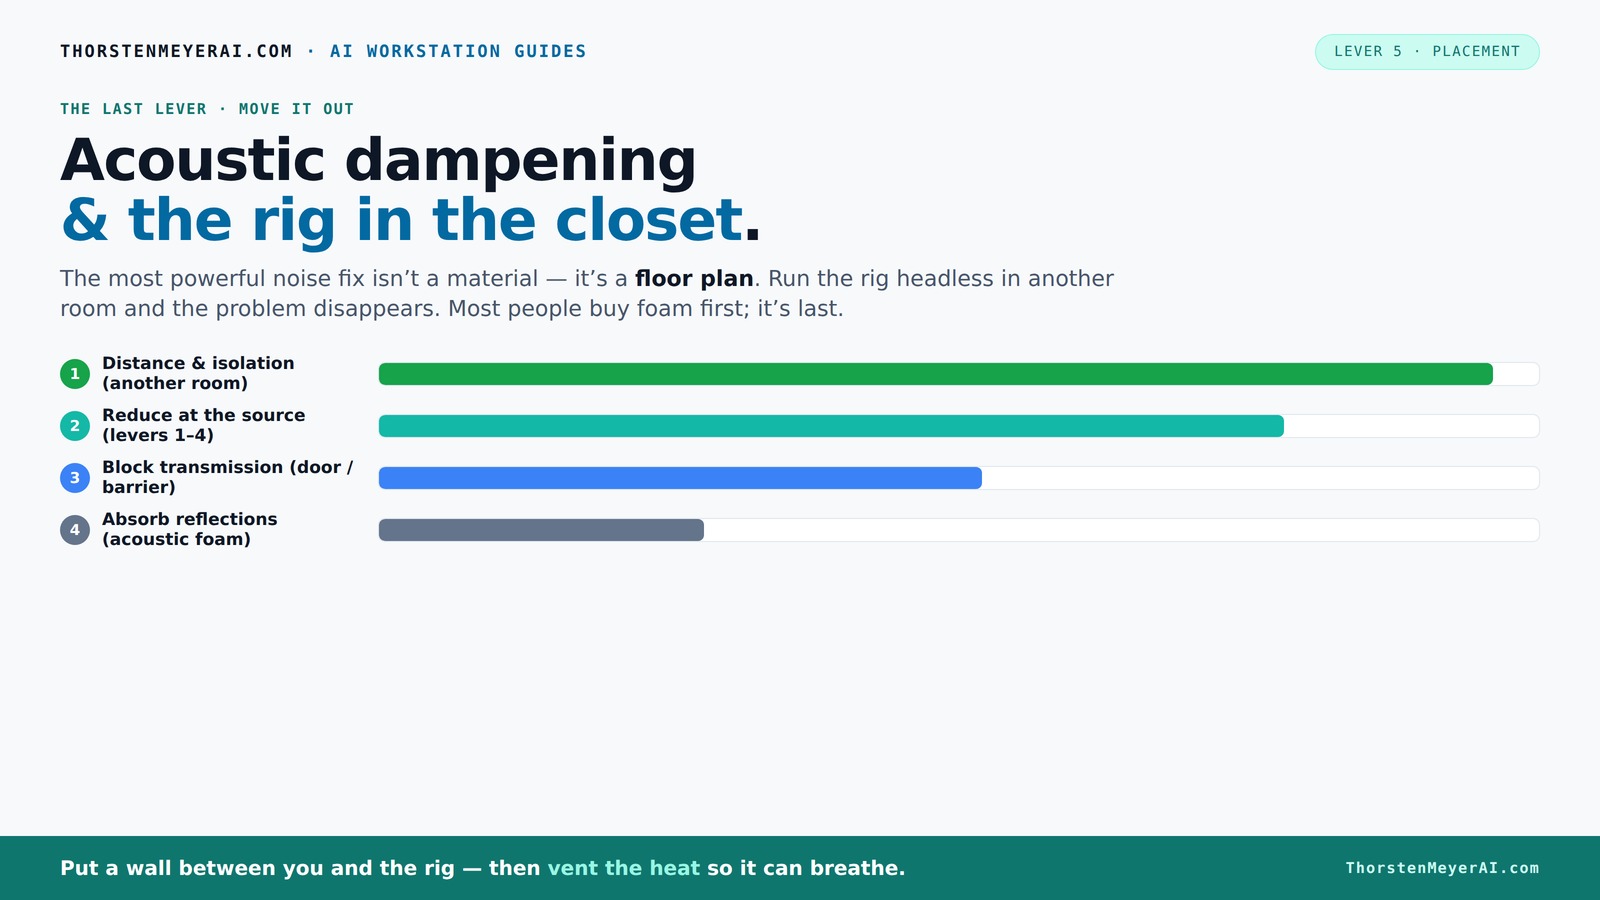
Acoustic dampening
& the rig in the closet.
The most powerful noise fix isn’t a material — it’s a floor plan. A rig you can’t hear because it’s in another room beats any amount of foam. Tap the approaches in Part 1 to see what actually works.
(another room)
(levers 1–4)
(door / barrier)
(acoustic foam)
Contain the noise, not the heat
Key Takeaways
- Distance your rig from your workspace whenever possible—nothing beats a wall for noise reduction.
- Ventilation is critical—sealed closets trap heat, which can cause fans to roar and defeat noise goals.
- Layer soft materials like blankets and foam at reflection points—not just corners—to improve sound clarity.
- Placement of mic and furniture affects echo and low-end buildup; small moves can make a big difference.
- Treat gaps around doors and windows to prevent sound leaks, but avoid sealing completely without airflow.
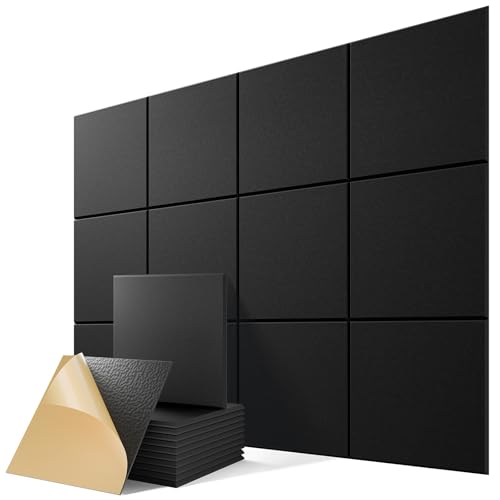
12 Pack Self-Adhesive Acoustic Panels, 12" X 12" X 0.4" High-Density Sound Proof Foam Panels for Walls, Soundproof Wall Panels for Home & Office (Black)
Superior Noise Reduction & Echo Cancellation - Tired of background noise and poor acoustics? Our soundproof wall panels...
As an affiliate, we earn on qualifying purchases.
As an affiliate, we earn on qualifying purchases.
What Acoustic Dampening Means for Your Closet Setup
Acoustic dampening in a closet means reducing reflections and echoes, not full soundproofing. It’s about soaking up echoes inside the space so your voice sounds clear, not muffled. Think thick blankets, foam, or soft materials that absorb sound waves before they bounce around.
For example, hanging a thick blanket on the closet door or lining shelves with foam pads can soften the echo. The goal is to make your voice sound tight and focused, not like it’s in a box full of hard surfaces.
Recent DIY closet studios show how layering soft materials—blankets, foam, even rugs—transforms a boxy echo chamber into a cozy, controlled environment.

Olanglab Acoustic Wall Panels 10 Pack, 48 x 24 per Acoustic Panels Sound Absorbing, Sound Panels for Home Studio and Office, Plain Dark Gray
Packaging: Comes with 10 panels, covering a total of 77.35 square feet. Each Olanglab Accent Wall Panel measures...
As an affiliate, we earn on qualifying purchases.
As an affiliate, we earn on qualifying purchases.
Why Placement of Your Mic and Equipment Matters More Than You Think
Placement is everything in a tiny closet. Your microphone’s position relative to your mouth and the closet surfaces can make the difference between a clear, natural sound and a boxy, boomy mess.
For instance, sit about 6-8 inches away from the mic, slightly off to the side, to avoid capturing plosives and room reflections. Keep the mic away from reflective surfaces like metal shelves or hard walls that bounce sound back.
Experiment with where you stand; small shifts can reduce echo by 20% or more. And don’t forget to treat nearby surfaces—not just the corners—since they’re often the main reflection points.
Understanding the importance of placement helps you maximize your existing setup without investing in costly treatments. It’s about finding that sweet spot where your voice is clear, and unwanted reflections are minimized, which can be the difference between a professional sound and a muddy recording.

GroTheory 2 Pack Door Draft Stopper, Under Door Sweep for Exterior & Interior Doors, Weather Stripping Door Seal, Garage Window Blocker Noise Cold Air Insulation, Draft Guard White 2" W x 39" L
PREMIUM MATERIALS - The Door Draft Stopper are made of silicone material, which can bend and deform. Draft...
As an affiliate, we earn on qualifying purchases.
As an affiliate, we earn on qualifying purchases.
Best Materials for a DIY Closet Vocal Booth
Effective closet treatment doesn’t have to break the bank. You can use a mix of everyday soft materials that absorb sound and reduce low-end buildup.
Popular choices include:
- Thick blankets—hanging or draping them over walls and doors.
- Foam panels—especially on the ceiling and walls near the mic.
- Rugs and carpets—placed on the floor to dampen reflections.
- Moving blankets—easy to hang and remove, renter-friendly.
- Bass traps—thicker foam or specialized low-frequency absorbers for the low end.
Choosing the right materials involves understanding their acoustic properties. For example, thick blankets are excellent for mid and high frequencies but less effective at low frequencies, which often require specialized bass traps. Foam panels are more consistent but can cause flutter echoes if placed improperly. Rugs on the floor help reduce reflections and standing waves, especially when placed near reflective surfaces. Layering these materials strategically—combining blankets, foam, and rugs—creates a balanced environment that improves clarity and reduces unwanted resonance. For around $100, you can craft a surprisingly effective booth, but be mindful of tradeoffs: too much absorption can deaden your sound, making it sound unnatural. The key is to find the right balance for your voice and setup.

Focusound 52 Pack Acoustic Foam Panels 1" x 12" x 12" Sound Proof Foam Panles Soundproofing Noise Cancelling Wedge Panels for Home Office Recoding Studio with 300PCS Double-Side Adhesive
Soundproofing - Acoustic foam panels triangular grooves structure for better noise absorption, helps to reduce and absorb unwanted...
As an affiliate, we earn on qualifying purchases.
As an affiliate, we earn on qualifying purchases.
How to Arrange Your Mic, Desk, and Door for Better Sound
In a small closet, placement isn’t just about the mic—your entire setup influences sound. Position your mic so it’s not facing reflective surfaces like the back wall or door.
Follow this simple plan:
- Place the mic about 6-8 inches from your mouth, slightly off-center.
- Position yourself away from walls or reflective surfaces—use a portable desk or stand to keep space clear.
- Seal gaps around the door with draft stoppers or weatherstripping to prevent sound leaks.
- Keep cables and equipment off the floor to avoid bouncing sound back up into the mic.
Strategic placement reduces the chance of sound bouncing back into the mic, which can create a hollow, echoey sound. For example, shifting your mic slightly to the side can help avoid direct reflections from the door or wall. Sealing gaps around the door prevents sound leaks, which is crucial in small spaces where even tiny leaks can cause noticeable noise. Elevating your equipment and keeping cables tidy minimizes vibration and bouncing, which can add unwanted noise. These small adjustments can significantly improve clarity and reduce background noise, making your recordings sound more professional without costly upgrades.
Common Mistakes That Turn Your Closet Into a Echo Chamber
Many DIY closet rigs fall into traps that make sound worse—here’s what to avoid.
- Over-treating corners with bass traps only—ignoring other reflective surfaces.
- Sealing the closet completely without ventilation, causing heat buildup.
- Hanging foam directly against hard walls without a slight gap—causing flutter echoes.
- Placing the mic directly facing a reflective door or window.
- Using only rigid foam panels, which reflect low frequencies instead of absorbing them.
For example, one creator sealed their closet with foam all over but didn’t consider airflow, leading to overheating and a loud fan noise—making the space worse. Additionally, over-treating certain areas while neglecting others can create uneven absorption, resulting in dead spots or exaggerated echoes. Sealing the space tightly without proper ventilation traps heat, which can cause equipment to overheat and fans to run constantly, adding noise that negates your soundproofing efforts. Hanging foam directly against surfaces without a gap can cause flutter echoes—where sound waves bounce back and forth rapidly—reducing clarity. Avoid these pitfalls by balancing treatment with ventilation.lation and understanding how sound interacts with different materials and surfaces.
FAQ: Your Closet Soundproofing & Dampening Questions Answered
Q: How much treatment do I need in a closet? It depends on your goal. For basic voice work, layering blankets and foam on reflection points works well. For more control, add bass traps and ceiling treatment.
Q: Should I use foam, blankets, or panels? Mix materials. Foam is great for high frequencies, blankets absorb mid to low frequencies, and panels can be tailored for specific reflection points.
Q: Do I need to treat the door, floor, and ceiling? Yes, especially gaps around the door. Use weatherstripping, draft stoppers, or blankets. The floor can be covered with rugs, and ceiling treatment helps with reflections.
Q: How do I stop echo without deadening the sound? Use a combination of absorption and diffusion. Don’t cover every surface, leave some space for natural reflection, to keep your voice lively.
Q: Can I build a closet booth without permanent modifications? Absolutely. Use removable blankets, tension rods, and portable panels for a renter-friendly setup.
Frequently Asked Questions
How much does a DIY closet booth cost to set up?
Most setups can be assembled for under $200 using blankets, foam panels, and some basic sealing materials. Major upgrades like bass traps or specialized ventilation can increase the price but aren’t always necessary.Can I completely soundproof a closet for recording?
Complete soundproofing in a small closet is difficult and expensive. The goal is to reduce reflections and leaks enough for good sound quality, not total isolation. For serious soundproofing, consider dedicated rooms or professional booths.What’s better for a closet booth: foam or blankets?
Both have their place. Foam absorbs high frequencies and echoes, while blankets dampen mid and low frequencies. Combining both creates a more balanced sound environment.How do I prevent my closet from overheating?
Use active ventilation like exhaust fans or ducted airflow. Avoid sealing the space completely, and consider heat-exporting solutions like liquid cooling or AIO radiators for high-performance rigs.Conclusion
Turning a closet into a quiet, effective space isn’t about filling every inch with foam. It’s about smart placement, ventilation, and layering soft materials where they matter most.
Think of it as carving out a cozy, controlled bubble for your voice or gaming. With a little ingenuity, your closet can become a surprisingly effective studio or command center—without breaking the bank or sacrificing heat dissipation.